Deploy a contract
This guide will help you deploy a smart contract on Taiko.
Prerequisites
- A wallet with some testnet ETH on Taiko (can receive this from the bridge).
- The private key to the account with testnet ETH on Taiko.
Deploy a contract using Foundry
-
Install Foundry
Open a terminal and run the following commands to install Foundry:
Terminal window curl -L https://foundry.paradigm.xyz | bashfoundryup -
Create a project with Foundry
Terminal window forge init hello_foundry && cd hello_foundry -
Deploy your contract
Deploy the contract located at
src/Counter.sol. ReplaceYOUR_PRIVATE_KEYbelow with your private key which has some testnet ETH on Taiko.Terminal window forge create src/Counter.sol:Counter \--rpc-url https://rpc.hekla.taiko.xyz \--private-key YOUR_PRIVATE_KEY
Deploy a contract using Hardhat
Hardhat is an Ethereum development environment for deploying smart contracts, running tests, and debugging Solidity code locally. It is one of the popular smart contract development frameworks. This guide demonstrates deploying a Storage smart contract on Taiko using Hardhat, highlighting the compatibility of Ethereum contracts with Taiko.
-
Set up the environment Hardhat is a flexible Ethereum development environment designed for testing, compiling, and deploying smart contracts. It requires Node.js, npm, and Git to get started.
To effectively use Hardhat, your system must have Node.js (v10+ LTS) and npm installed.
-
Create a Hardhat project
- In your desired directory, run
Terminal window mkdir hello-hardhat && cd hello-hardhat- Initialize an npm project
Terminal window npm init -y- Install dotenv for environment variable management
Terminal window npm install dotenv- Add Hardhat to your project
Terminal window npm install --save-dev hardhat- Initialize Hardhat
Terminal window npx hardhat initChoose
Create a JavaScript projectand follow the prompts, agreeing to create a.gitignoreand install suggested dependencies. -
Configure Your Project
- Delete
Lock.solin the/contractsdirectory. - In your project’s
/contractsdirectory, create a new file namedStorage.soland paste the provided Solidity code into it using your text editor.
/contracts/Storage.sol // SPDX-License-Identifier: GPL-3.0pragma solidity >=0.8.2 <0.9.0;contract Storage {uint256 number;function store(uint256 num) public {number = num;}function retrieve() public view returns (uint256){return number;}}This contract, named
Storage, includes functions to store and retrieve auint256number.- Create the
/scriptsto write a deployment script. Then create and open a newdeploy.jsfile to insert the provided JavaScript code. - Proceed to the
/scriptsdirectory of your Hardhat project to write a deployment script. Then create and open a newdeploy.jsfile to insert the provided JavaScript code.
/scripts/deploy.js const { ethers } = require("hardhat");async function main() {const StorageContract = await ethers.getContractFactory("Storage");const storageContract = await StorageContract.deploy();await storageContract.waitForDeployment();const tx = await storageContract.deploymentTransaction();console.log("Contract deployed successfully.");console.log(`Deployer: ${storageContract.runner.address}`);console.log(`Deployed to: ${storageContract.target}`);console.log(`Transaction hash: ${tx.hash}`);}main().then(() => process.exit(0)).catch(error => {console.error(error);process.exit(1);});-
Populate the
.envfile. That is,- Create a
.envfile within therootfolder. - Populate
.envwith yourYOUR_PRIVATE_KEYand the Taiko’sRPC_URLas follows:
- Create a
RPC_URL="https://rpc.hekla.taiko.xyz"YOUR_PRIVATE_KEY="<insert private key here>"- Update
hardhat.config.jswith the following configuration to include Taiko network settings and Solidity version.
hardhat.config.js require('dotenv').config();require("@nomicfoundation/hardhat-toolbox");module.exports = {solidity: "0.8.20",networks: {taiko: {url: process.env.RPC_URL,accounts: [process.env.YOUR_PRIVATE_KEY],}}}; - Delete
-
Compile your contracts To compile your smart contracts, run
Terminal window npx hardhat compileYour compiled contracts will be located in the
artifacts/directory. -
Deploy your contracts To deploy your contracts to Taiko network, use
Terminal window npx hardhat run --network taiko scripts/deploy.jsThis command deploys your
Storagecontract to the Taiko. For additional details on deploying contracts with Hardhat, refer to the Deploying Contracts with Hardhat. The output on the terminal looks like as below.Terminal window Contract deployed successfully.Deployer: 0xFdBA275E47....Deployed to: 0x77De5f1e40....Transaction hash: 0x75f219defa....You can now check your deployed contract on the explorer using the
deployed contract address.
Deploy a contract using Remix
-
Open Remix IDE
Visit Remix IDE.
-
Create a new
.solfile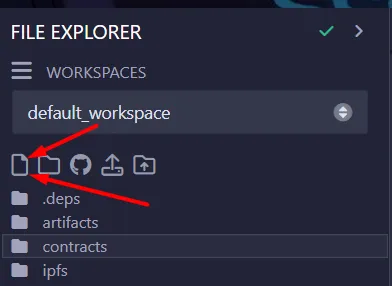
- Give it any name, for example
Counter.sol. - Fill with this example code:
// SPDX-License-Identifier: MITpragma solidity ^0.7.0;import "https://github.com/OpenZeppelin/openzeppelin-contracts/blob/v3.4.0-solc-0.7/contracts/token/ERC20/ERC20.sol";contract Token is ERC20 {constructor () ERC20("Example Token Hekla", "ETH") {_mint(msg.sender, 1000000 * (10 ** uint256(decimals())));}} - Give it any name, for example
-
Compile
- Change the Compiler version to
0.7.0+commit.9e61f92b
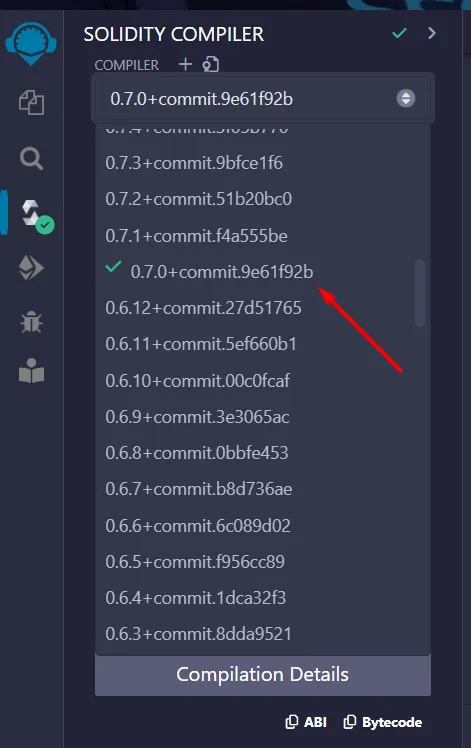
- Then compile it.
- Change the Compiler version to
-
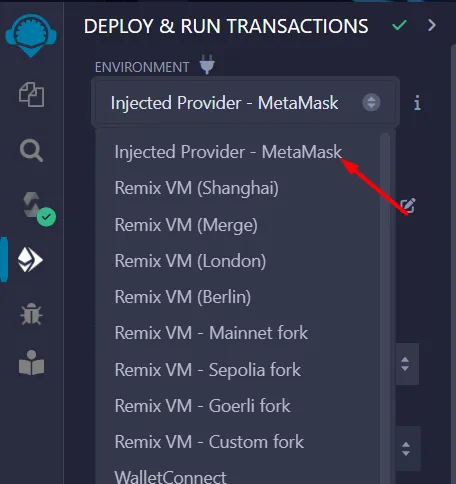
Deploy
- Change the Environment to
Injected Provider
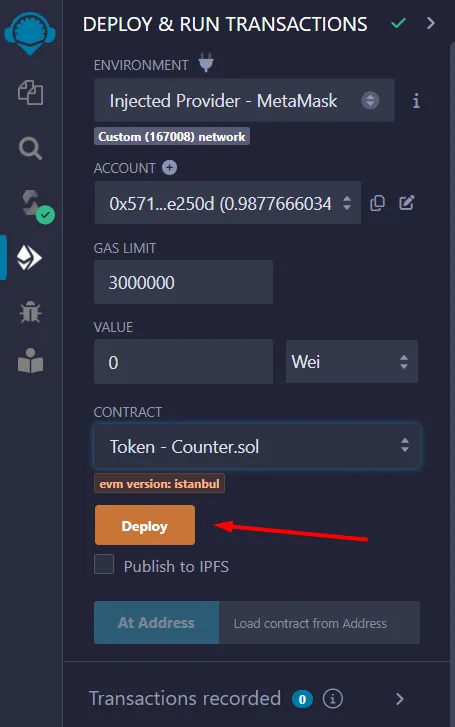
-
Then click
transact -
Finally, verify the smart contract using Blockscout
- Change the Environment to
Deploy a contract using thirdweb
Thirdweb offers a streamlined solution for deploying smart contracts to any EVM-compatible chain, including Taiko. By simplifying the deployment process, Thirdweb enables developers to focus on building without the hassle of managing private keys, RPC URLs, or deployment scripts. This guide demonstrates deploying a Lock smart contract on Taiko using Thirdweb, highlighting the compatibility of Ethereum contracts with Taiko.
-
Set up the environment
Before deploying a smart contract on Taiko with Thirdweb, ensure your contracts are ready in a folder or a Hardhat project.This setup can include a Hardhat project or any other structure where your contracts are organized.
For setup details, see our Hardhat Deployment guide on taiko.
-
Deploying with Thirdweb
-
Initialize Your Project
Navigate to your smart contract project’s root directory in the CLI and install Thirdweb globally using
npm i -g thirdweb. -
Deploy Your Contract
Execute
thirdweb deployin the CLI. This command initiates the deployment process. -
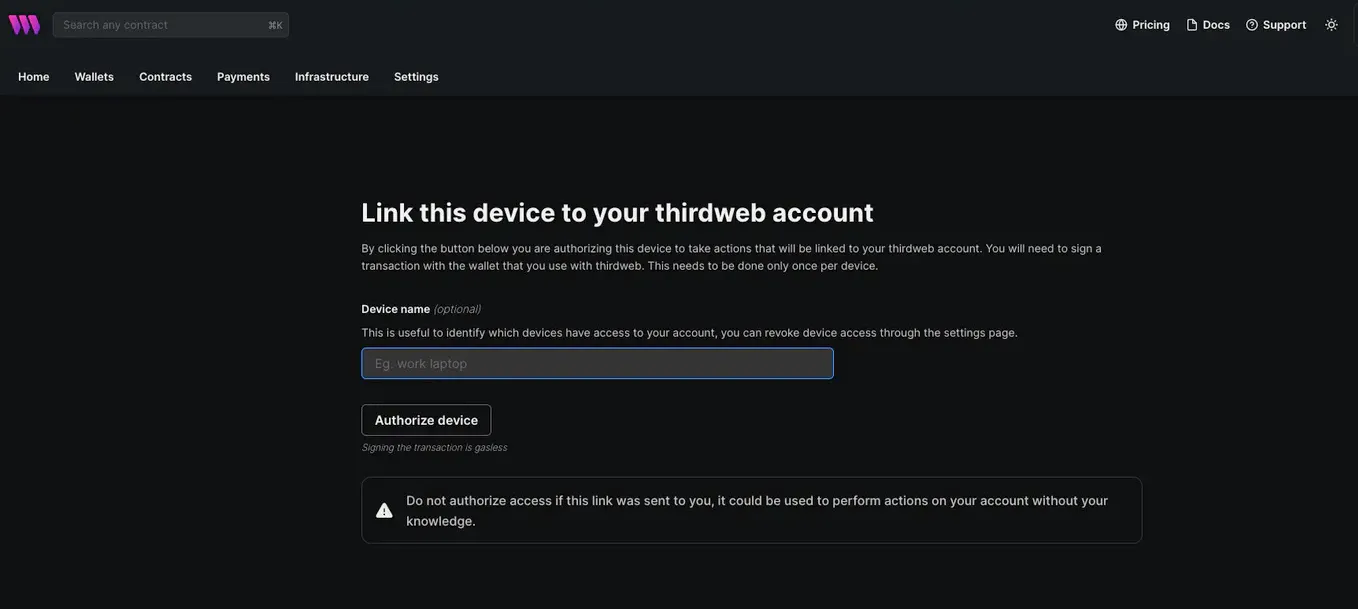
Authorize Your Device
A browser window will prompt you to connect and authorize your wallet. This step ensures secure deployment from your chosen wallet.
-
Access the Deployment Link
The CLI will provide a link. Open this link to proceed with deployment via the Thirdweb UI.
-
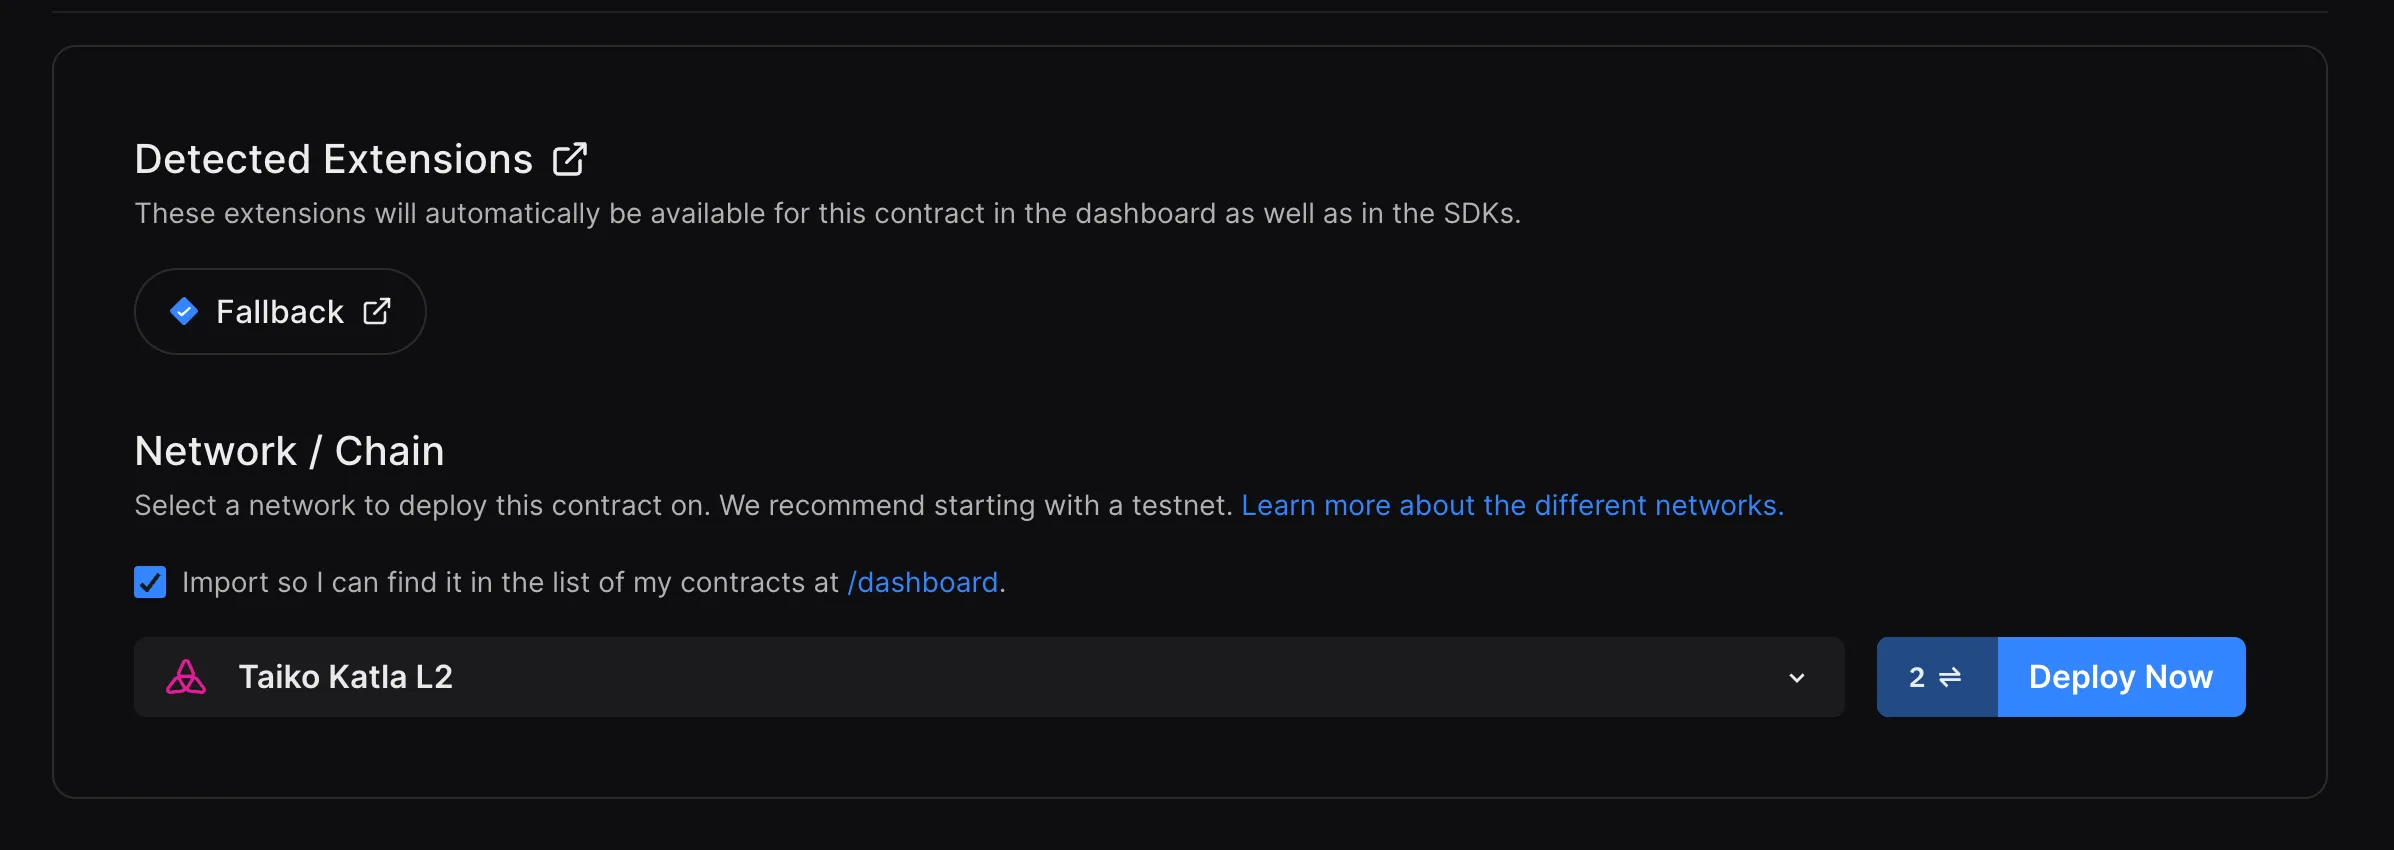
Complete Deployment Details
- Fill in the necessary fields in the Thirdweb UI.
- Select
Taiko Networkfrom the Chain drop-down menu. - Opt for
Add to dashboardif you wish to manage this contract from the Thirdweb dashboard. - Click
Deploy Nowand sign the transaction in your connected wallet.
For a more detailed documentation on deployments through Thirdweb using CLI, visit Thirdweb CLI Docs.
-
-
Managing Your Contract
After deployment, the Thirdweb dashboard allows you to manage and interact with your contract seamlessly. Deploying with Thirdweb not only streamlines the process but also enhances security by supporting browser-based wallets like MetaMask and others for deployment activities.